EXPOL Garage Door Insulation
Transform your garage into a more comfortable space with EXPOL's easy-to-install garage door insulation. Perfect for DIY installation and immediate energy savings.
EXPOL Garage Door InsulationA Simple DIY Upgrade for Warmer,Quieter and More Efficient Garages
The EXPOL Garage Door Insulation Kit transforms a standard sectional garage door into an insulated barrier — helping maintain warmer indoor temperatures in winter and cooler conditions in summer. As garages are often connected to living spaces, insulating the door can help reduce heat loss, improve comfort and lower the demand on household heating and cooling.
Designed as a simple DIY retrofit system, the kit includes lightweight EPS insulation sheets and durable liners that improve both the performance and appearance of the garage door. Once installed, homeowners benefit from a warmer, drier and quieter space, with additional reduction in noise transfer and improved usability for workshops, gyms, storage or hobby areas.
Available in 28mm and 35mm thicknesses to suit embossed or flat panel doors, each kit covers approximately 5.76m² — suitable for a single sectional garage door. The panels contain recycled content and can be fully recycled through EXPOL's nationwide recovery programme.
Installation typically takes 2–4 hours, requiring only basic tools, and is suitable for most standard sectional doors. This upgrade offers a cost-effective way to improve comfort and efficiency without needing structural changes or a full door replacement.
Key Features & Benefits
Why Insulate Your Garage Door?
Temperature Control
Warmer in winter, cooler in summer - improve your garage comfort year-round.
Energy Savings
Reduce heating and cooling costs by insulating your garage door effectively.
Easy DIY Installation
Simple retrofit solution that can be installed by homeowners in hours.
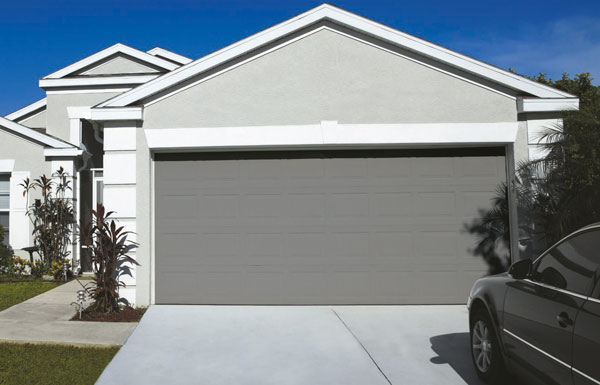
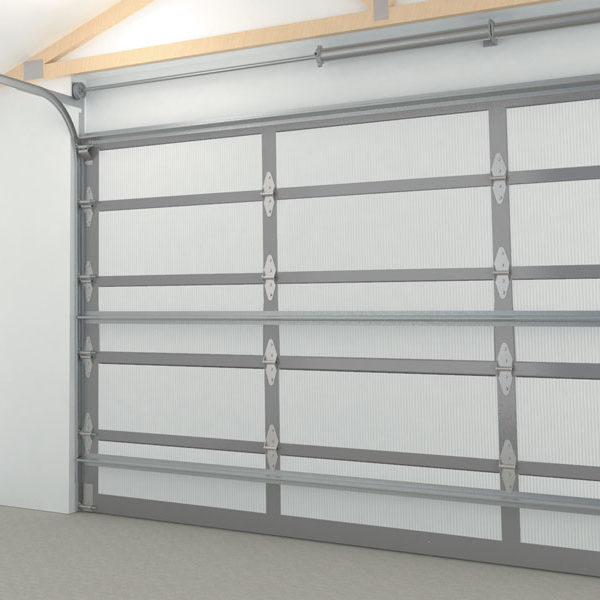
Garage Door Insulation - Product Range
Complete DIY solution for sectional garage door insulation
| Polystyrene Panel Thickness | Thermal Resistance (R Value) | Pack Inclusions |
|---|---|---|
| 28mm for Embossed Panel Garage Doors | 0.65 | 8 x Polystyrene Insulation Panels 8 x Polystyrene Corflute Door Liners 1 x Tube of Glue 1 x Instruction Sheet |
| 35mm for Flat Panel Garage Doors | 0.85 | 8 x Polystyrene Insulation Panels 8 x Polystyrene Corflute Door Liners 1 x Tube of Glue 1 x Instruction Sheet |
Product Notes:
- •Specifically for sectional garage doors
- •Kit insulates 1 single garage door / 5.76 m²
- •Enhances the appearance of your garage door
- •Double doors require 2 kits
- •Panel and liner size 1200mm x 600mm
Installing Expol Garagedoor Insulation
Follow our step-by-step visual guide for a professional installation
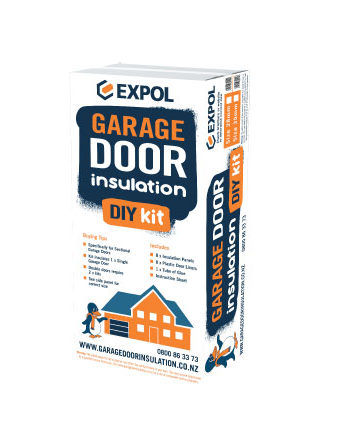
The EXPOL GARAGE DOOR Insulation DIY Kit
The EXPOL GARAGE DOOR Insulation DIY Kit is made for sectional Garage Doors. Each kit will insulate a single Garage Door of approx. 5.76m². You will need two kits to insulate a double garage door.
The polystyrene insulation and the corflute liners are supplied in 1200mm x 600mm sheets. You will need to cut the insulation panels and corflute liners to size to suit your garage door. Some garage doors have sections wider than 1200mm; for these doors, you will need to use some of the offcuts to make up the shortfall and use the glue to fix them in place against the door.
Do the same with the corflute liners but make sure the pieces used to make up the shortfall have the flutes running the same direction as the larger panels. The joins can be hidden with some white tape. Do not use the glue on the liners; they will stay in place if cut to the correct size.
Preparation
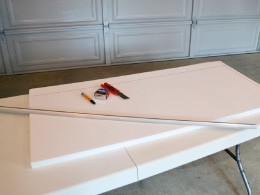
YOU WILL NEED:
- •Craft knife
- •Felt tip for polystyrene
- •Tape measure
- •Straight edge ruler
- •Work bench to cut on
SUPPLIED:
- •8 polystyrene panels
- •8 plastic cover panels
- •Glue tube to fix any loose panels
- •Instruction sheet
Step 1
Measure vertically the first door section to be installed as shown.
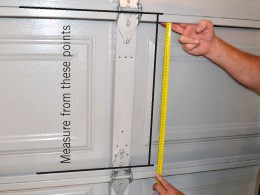
Step 1A
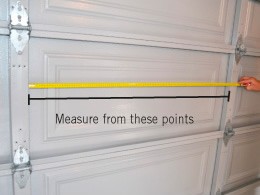
Measure horizontally the first door section to be installed as shown. As mentioned above if your panels are wider than 1200mm you will need to make this up with 2 pieces. Measure from these points.
Step 2
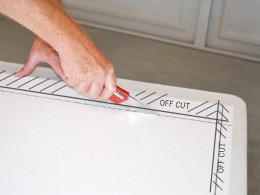
Mark out and cut polystyrene panels as shown.
Step 3
Use the offcuts to make inserts for the hidden vertical cavities as shown.
Note: Skip this step if there are no hidden cavities in your door.
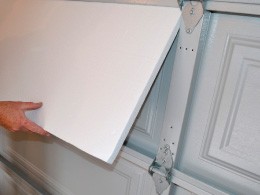
Step 4
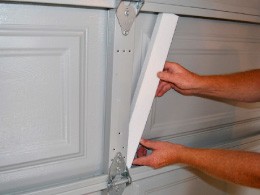
Install cut to size polystyrene panel as shown.
Repeat steps 1 – 3 to complete the remaining door sections. Use glue here if necessary.
Step 5
You are now ready to install the plastic door liners. Measure vertically the door section to be installed as shown.
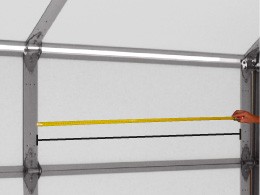
Step 5A
Measure horizontally the door section to be installed as shown. As mentioned in Step 1A if your panels are wider than 1200mm you will need to make this up with 2 pieces. You can then cover the join with a strip of white tape.
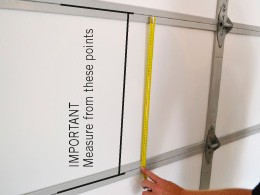
Step 6
Mark out and cut plastic door liners.
Caution: A neat cut is required to achieve a professional finish.
Insert plastic door liners as shown. Repeat steps 5 – 6 for all remaining door sections.
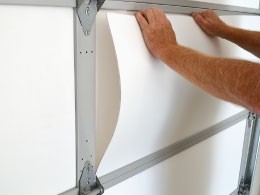
Finished
Congratulations, you now have a fully insulated garage door.
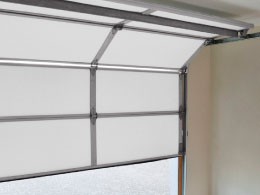
Slide 1 of 7: Introduction
Garage Door Insulation Specifications & Sizes
Kit composition and sizing for the EXPOL Garage Door Insulation DIY Kit, as detailed in the product brochure.
| Specification | Detail |
|---|---|
| 28mm panel construction | 25mm polystyrene panel + 3mm corflute liner (for embossed panel doors) |
| 35mm panel construction | 32mm polystyrene panel + 3mm corflute liner (for flat panel doors) |
| Panel and liner size | 1200mm x 600mm |
| Coverage per kit | 1 single garage door / 5.76 m² (double doors require 2 kits) |
| Kit inclusions | 8 x insulation panels, 8 x plastic door liners, 1 x tube of glue, instruction sheet |
| Suitability | Sectional garage doors only, embossed (28mm) or flat (35mm) panel styles |
| Recyclability | EXPOL garage door polystyrene panels can be recycled |
Source: EXPOL Garage Door Insulation Brochure (2022), linked above. For project-specific advice, contact the EXPOL Tech Team.
Ready to Insulate Your Garage Door?
Join thousands of satisfied customers who have improved their garage comfort and reduced energy costs with EXPOL garage door insulation.